Creating a CI/CD Pipeline for .net from GitLab to AWS Elastic Beanstalk

My AWS Confession
I'm not going to lie, I really love Azure and am not a huge fan of AWS. There I said it and I have my reasons that make sense to me. I realize tons of developers are the opposite, and everyone has their preferences, but there you have it. With that said, I do use AWS from time to time because I have clients on it.
Recently, I had to create a CI/CD pipeline from a GitLab repo to an AWS Elastic Beanstalk. I've made a bunch of pipelines into the Azure world, but this was a new one for me. I wanted a pipeline that handled building, testing, zipping and deploying.
AWS Setup
I'm assuming you already created an empty Beanstalk to start with. I just used the AWS plugin in Visual Studio to take care of spinning up the Beanstalk environment and application.
Once you have an environment/application, we first need to create a user in AWS and associate permissions.
1. Open up the IAM (Identity and Access Management) part of AWS.
2. Go to the Users section and Add a user. I called mine "devops-runner".
3. Associate the permissions you need. I used these for my demo purpose (which is overkill), but figure out what the minimal amount of permissions you need is and go from there:
AdministratorAccess-AWSElasticBeanstalk
AWSCloudFormationFullAccess
AmazonRDSDataFullAccess
AmazonEC2FullAcess
4. Go to the Security credentials tab of the user. Hit the button for "Create access key" and record the Access Key ID and the Secret Access Key. We'll need those in a minute.
5. Create an S3 storage bucket. We'll need that to store the zip file containing the GitLab code as a part of the pipeline.
GitLab Setup
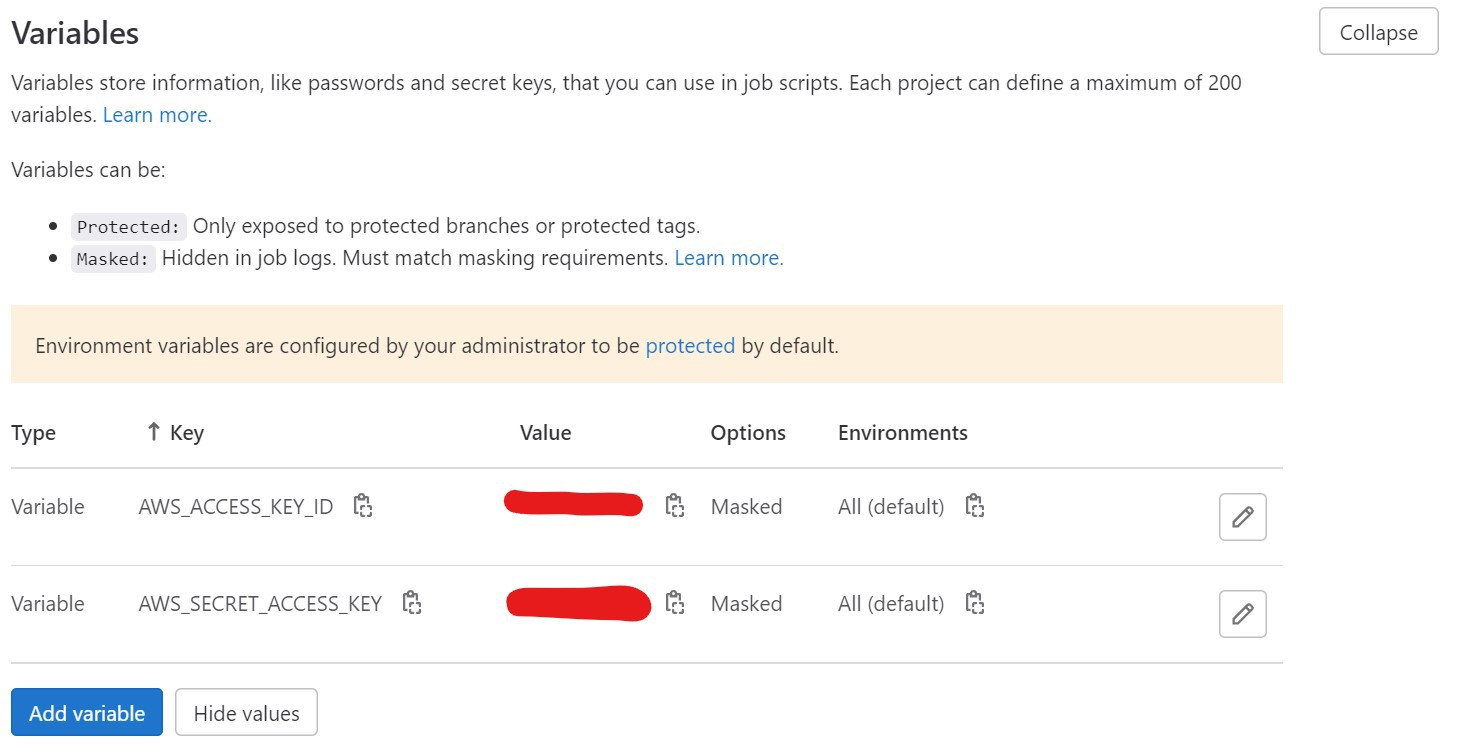
In GitLab, we need to define a couple variables and put them in the Settings -> CI/CD -> Variables section in GitLab. They are the following:
$AWS_ACCESS_KEY_ID
$AWS_SECRET_ACCESS_KEY
Note: we'll be using a couple of GitLab's built-in variables as well, these are the following:
$CI_COMMIT_REF_NAME
$CI_PIPELINE_ID
YAML Time
Here's my example YAML that you can drop into your CI/CD → Editor in GitLab and customize.
# define our default image
image: mcr.microsoft.com/dotnet/sdk:latest
variables:
 # profile the path to your proj file.  I usually have more than one project in my solution so this is needed.
 PROJ_PATH: 'path/to/your/projectname.csproj'
 RELEASE_FOLDER: 'path/to/your/bin/Release'
 # define where to put your build. You can make this up.
 BUILD_FOLDER: '/new/path/to/put/your/builds'
 # define where to put your zip file containing your build
 ZIPFILE: '/new/path/to/put/your/builds/$CI_COMMIT_REF_NAME-$CI_PIPELINE_ID.zip'
 # define some of your AWS variables...these could be defined in the settings/CICD/variables as well if you wanted.
 REGION: 'us-west-1'
 APPNAME: 'nice-app-name'
 ENVNAME: 'nice-env-name'
 S3BUCKET: 'name-of-s3-bucket'
 S3KEY: '$CI_COMMIT_REF_NAME-$CI_PIPELINE_ID' #this is what we'll be calling the zip file in S3.


# define the stages of the pipeline
stages:
 - build
 - test
 - publish
 - deploy


# BUILD the .net project
build_job:
 stage: build
 only:
   - master
   - tags
 script:
   - 'dotnet restore $PROJ_PATH'  # restore Nuget dependencies
   - 'dotnet build $PROJ_PATH --configuration Release --no-restore'  # build the project
 artifacts:
   expire_in: 1 week  # save gitlab server space, we copy the files we need to deploy folder later on
   paths:
     - '$RELEASE_FOLDER'  # saving to deploy folder


# TEST the .net project (you are writing tests, right?)
test_job:
 stage: test
 only:
   - master
   - tags
 script:
   - 'dotnet test $PROJ_PATH --no-build -l "console;verbosity=detailed"'


# PUBLISH the .net project and copy it into your desired build folder (relative to the repo root)
publish_job:
 stage: publish
 only:
   - master
   - tags
 script:
   - 'dotnet publish $PROJ_PATH --os linux -o $BUILD_FOLDER'
 artifacts:
   expire_in: 1 week  # save gitlab server space, we copy the files we need to deploy folder later on
   paths:
     - '$BUILD_FOLDER'  # saving


# DEPLOY to AWS S3 and our beanstalk
deploy_job:
 stage: deploy
 # let's use one of gitlab's premade images that comes with the aws cli already installed
 image: registry.gitlab.com/gitlab-org/cloud-deploy/aws-base:latest
 only:
   - master
   - tags
 script:
# here's some debugging if you need to see where you're copying your files
   #- echo $ZIPFILE
   #- 'echo $BUILD_FOLDER/*'
# install zip
   - apt install zip
# go to the build folder and zip everything up
   - cd $BUILD_FOLDER
   - zip -r $ZIPFILE *
   - cd /
# configure our AWS security and such
   - aws configure set aws_access_key_id $AWS_ACCESS_KEY_ID
   - aws configure set aws_secret_access_key $AWS_SECRET_ACCESS_KEY
   - aws configure set region $REGION
# copy up the build
   - aws s3 cp $ZIPFILE s3://$S3BUCKET/$S3KEY
# using the zip file, update the beanstalk with the latest code
   - aws elasticbeanstalk create-application-version --application-name $APPNAME --version-label $S3KEY --source-bundle S3Bucket=$S3BUCKET,S3Key=$S3KEY
   - aws elasticbeanstalk update-environment --application-name $APPNAME --environment-name $ENVNAME --version-label $S3KEY
Hopefully this speeds up your pipeline creation. Happy DevOps!